Sunday, 22 October 2017

Jump Statement:Break,Go To and Continue statement

JUMP STATEMENTS

Jump statements are used to interrupt the normal flow of the program or you can say that the jump statements are used to jump a particular statement or piece of code.

Types of jump statements:-
  • Break
  • Continue 
  • GoTo
BREAK STATEMENT:-

The break statement is used inside the loop or switch case.It is used to come out from the loop or switch case.When we use break statement it terminates the loop or switch case and shows the result.

Syntax:-
.....
.....
break;
To check how break statement works?click here

CONTINUE STATEMENT:-

Continue statement is used inside the loop.This statement is used to skip a particular part of the code and resume the loop.

Syntax:-
while(test Expression) //you can use for loop and do while loop 
{
//codes
if(condition for continue)
{
 continue;
}
//codes
}
Program to print reverse numbers from 10 to 1 except 5:-
#include<iostream>
using namespace std;

 int  main()
{
    for(int n=10;n>=1;n--)
   {
        if(n==5) continue;
        cout<<"\n"<<n;
    }
    return 0;
}
Output:
10
9
8
7
6
4
3
2
1

The above program print numbers from 10 to 1 except 5 because we use continue statement when n==5 that means it will skip 5 and print remaining numbers.

GO TO STATEMENT:-

GoTo statement is another type of jump statement. it can be used to jump from anywhere to anywhere within in the function, sometimes it is also referred as an unconditional jump statement.

Syntax:-
goto label;
.
.
.
label:

Or
label:
.
.
.
goto label;
The label is an identifier.When goto statement is encountered, control of the program jumps to label: and start executing the code.

Program to print the square of positive numbers:-

#include<iostream>
#include<conio.h>
using namespace std;

int main ()
{
    int n;
    float result;
start:
    cout<<"Enter any no:";
    cin>>n;
    if(n<=0)
    {
        goto start;
    }
    else
    {    
        result =n*n;
        cout<<"Square is :"<<result;
   }
    return 0;
}
Output:-
Enter any no:-1
Enter any no:0
Enter any no:2
Square is :4
In the above program, whenever the number is less or equal to zero, it will jump to start statement and ask to enter the number again when the number is greater than zero, it shows the result. 

NOTE: Avoid use of GoTo Statement because it makes the program logic very complex and difficult to modify.

you can use continue and break statement instead of GoTO statement.

Whether you use GoTO statement or not....
If the use of GoTo statement makes your program simpler than you should use it else avoid it.

KEEP CODING....


Friday, 20 October 2017

Do While Loop

DO... WHILE LOOP      

Do... while is another type of looping.It is quite different from the for loop but similar to the while loop with one important difference. In do... while loop initialization at the top of the loop, update condition inside the loop and test condition at bottom of the loop.The body of do..while loop is executed once, Before checking the test expression. Hence the do...while loop is executed at least once.

syntax:-
do
{
   // codes
}
while (testExpression);
program to add numbers until the user enters zero:-
#include <iostream>
using namespace std;
int main()
{    

    double number, sum = 0;
    
    do
    {
        cout<<"Enter a number: ";
        cin>>number;
        sum += number;
    }
    while(number != 0.0);

    cout<<"Sum: "<<sum<<endl;

    return 0;
}
Output:-
Enter a number: 5
Enter a number: -5
Enter a number: 21
Enter a number: 0
Sum: 21
Now take a look how do...while loop works?

The code inside the body will be executed once.
Then the test condition is evaluated.If the condition is true then the loop body will be executed again until the test condition becomes false.
when the test condition becomes false, the do...while loop will be terminated.

INFINITE DO... WHILE LOOP:-

#include<iostream>
using namespace std;
int main(){
 
 do{ 
 
  cout<<"hello world"<<endl;
  
  
 }while(1);
 
 return 0
}
Just provide 1 instead of the test condition, the loop will run infinite time.
NOTE:- press CTRL+C to terminate the loop.

NESTED DO...WHILE LOOP:-

#include<iostream>
using namespace std;
int main(){
 int i=0;
 do{
  
  int j=0;
  do{
   
   cout<<j;
   
   j++;
   
  }while(j<=5);
  i++;
  
  cout<<"\n";
  
 }while(i<=5);
 
 return 0;
}
Output:-
012345
012345
012345
012345
012345
012345
In nested do...while another do...while is present inside the body of the loop.It is similar to nested for and while loop.

Let take an example how do...while loop is different from other loops.

#include<iostream>
using namespace std;

int main(){
 
 int i=6;
 do{ 
 
 cout<<i<<endl;
 
 i++; 
  
 }while(i<=5);
 
 return 0;
}
 will this program work? yes,  it will work and print 6 on the screen because in do...while the condition is checked at the end of the program. 
we use do...while loop in game programming because when the game ends, you need to show the scoreboard to the player. we use do...while loop so at least once to render the scoreboard.

HAPPY CODING...


Saturday, 14 October 2017

While Loop

WHILE LOOP

while studying for loop we have seen that all the three parts of the loop are present in a line but in while loop, there is a difference in the syntax.In while loop, we initialize the loop outside the loop then test condition where the loop is defined and update condition in the body of the loop.

syntax:-
initialization expression;
while (test_expression)
{
   // statements
 
  update_expression;
}
program to print even number between 0 to 10:-

#include<iostream>
using namespace std;
int main(){
 int i=0; //initialization 
 while(i<=10)   //test condition
 {
  
  cout<<i<<endl;
  i=i+2;     //update condition
  
 }
 return 0;
}
output:-
0
2
4
6
8
10
In the above program, we declare and initialize i=0, then it will compare the value of i with the test condition, if it is true then the body will execute and give increment to the i and the condition run itself again and again. when i is greater then test condition, the condition became false and the loop will terminate. 

INFINITE WHILE LOOP:-
In this loop, there is no initialization, test condition, and update condition just provide 1 instead of the test condition.

syntax:-
#include<iostream>
using namespace std;
int main(){
 
 while(1)  
 {
 
  cout<<"hello world"<<endl;
 
  
 }
 return 0;
}
Note: you will use CTRL+C to terminate the loop.

NESTED WHILE LOOP:-
In nested while loop, a while loop is present inside the body of the while loop.

syntax:-
 initialization;
 while(test condition)  
 {
  initialization;
      while(test condition)
      {
       //statements
       update condition;
          }
   update condition;
       
 }
HOW TO USE WHILE LOOP IN COMPETITIVE PROGRAMMING:-

program:-
#include<iostream>
using namespace std;
int main()
{
 int t;
 cin>>t;
 int n;
 while(t--)
 {
  cin>>n;
  if(n<10)
   cout<<endl<<"what an obedient servant you are!";
  else
   cout<<endl<<"-1";
 }
 return 0; 
}
Now understand the program, you want to run the program for different test cases, you will use while loop in the above manner.

KEEP CLAM AND CODE C++.....


Tuesday, 10 October 2017

How to Install Codeblocks IDE on windows 7 ,8 and 10?

How to install and use codeblocks IDE on windows 7,8 and 10?
hello Folks,
In this post, I will share the steps to download and install codeblocks on windows OS and also share how to use it and compile the program on it.

step by step procedure to install codeblocks

1. As we know codeblocks is a free, open source, cross-platform IDE. To download codeblocks go to  www.codeblocks.org/.


2. Click on downloads and different ways to download will open.

3. Click on Download the binary release. You can download other ways too but for learning C++ binary release is best. 

4.  Different types of files will open then go to codeblocks-16.01mingw-setup.exe file and click on sourceforge.net.your setup will start downloading, the file is about 98Mb.


5. Go to the disk where you download the file.

6.  Double click on the setup file. The system will ask for running permission.click on yes.

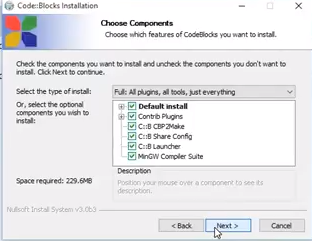
7. A setup window will appear. Now click on the NEXT ->I AGREE -> NEXT -> INSTALL.


8. Now it will ask for the permission to run the codeblocks.Click on YES.

9. Now compiler auto detection window will appear.click on OK.

10. Codeblocks will open. Select the environment " yes, associate  code::blocks with c/c++ file types".Your codeblocks will be installed on the system.


How to use it.

1. Click on the codeblocks icon the desktop. it will open.


2. Go to top left corner of the IDE. Click on the FILE  -> NEW -> PROJECT.

3. Now select the application type.In this post, we are making console application so select console application.


4. Console application will open. Select NEXT.


5. Select the language you want to use.For this post, we use C++.


6. Write project name then click on finish.


7. Go to the left side. click on the source. A default main function will open.


Now you can use codeblocks for making C/C++ program.

HAPPING CODING

Friday, 29 September 2017

Types Of For Loop

In the previous post, we understand how for loop works and three parts of for loop.In this post, I will discuss the types of for loop or in which way you will use for loop.
For loops are mainly two types:

  • Infinite for loop
  • Nested for loop
THE INFINITE FOR LOOP:-
A loop becomes infinite loop if the condition never becomes false. For loop required three parts to run initialization, test expression, and update. if you leave the conditions empty that will make the endless loop.

Syntax:-
#include <iostream>
using namespace std;
 
int main () {
   for( ; ; ) {
      cout<<"This loop will run forever.\n";
   }

   return 0;
}
when the conditional expression is absent, it is assumed to be true. you may use initialization and update expression but most of the
programmers prefer "for(; ;)" to construct an infinite for loop.

NOTE:- you will use CTRL+C to terminate the infinite for loop.
use printf("This loop will run forever.\n"); instead of cout<<"This loop will run forever.\n"; do it yourself and see what happened.

NESTED FOR LOOP:-
The placing of one loop inside the body of another loop is called nesting.In nested for loop, a for loop is present inside the another for loop. 

Syntax:-
for ( initialization; test condition; increment ) {

   for ( initialization; tset condition; increment ) //using another variable{
      statement(s);
   }
 
   statement(s);
}

program to print number in the right triangular pattern:-

#include <iostream>
using namespace std;
int main()
{
    int i,j;
    for(i=1;i<=5;i++)
    {
        for(j=1;j<=i;j++)
            cout<<j;
            cout<<"\n"; 
    }
    return 0;
}
Output:-
1
12
123
1234
12345

now take a look how nested loop works? the outer for loop start working,i=1 then it will compare to test condition 1<=5 if the condition is true then it will go to inner for loop and give an increment. In inner for loop j=1, and test condition is 1, i is 1 and j<=i now it will run once and exist from inner for loop and go to outer for loop.Next time i become 2 outer for loop will run once but inner loop will run twice.The process will repeat again and again whenever test condition does not become false.
    
    happy coding....keep learning.

Sunday, 24 September 2017

Iteration Statement- For Loop

Iteration is a process where a set of instruction or statement is executed repeatedly for a specified number of time or until a condition is met.Iteration statements are commonly known as loops.There are three types of looping statements in C++:

A looping is consist of three parts:- initialization, test expression, increment/decrement or update value. A loop will run whenever the test condition is not met if the test condition is met then the loop will break and show the result on the screen.

For loop is most commonly used looping technique because in for loop all three parts of the loop: initialization, test expression, increment/decrement or update value in the same line.

Syntax:
for(intialization;test expression;increment/decrement)

{
 
 //body of loop
 
}
In the above syntax, you will see three parts of the loop in the same line and the three parts are separated by the semicolon, not by the comma's.

Program to print 1 to 10 number by using for loop:
#include<iostream>
using namespace std;
int main(){
 int i;
 cout<<"numbers from 1 to 10"<<endl;
 for(i=1;i<=10;i++){
  cout<<i<<endl;
  
 }
 return 0;
}
Output:
numbers from 1 to 10
1
2
3
4
5
6
7 
8
9
10

Now, let understand how for loop works? Here we have the initial value of i as 1(initialization).The test condition is i<=10 and update expression is i++.
In the beginning, the control goes to the initial condition and assigns the value 1 to i. Now its check whether 1<=10, if the condition is true then the body of the loop will execute and give an increment to i and assign the value 2 to i. Again its check whether 2<=10, if the condition is true then the body of the loop will execute. The whole process will run whenever the test condition is not met. When i becomes equal to 11, the condition i<=10 becomes false and the loop terminates and the program ends.


Friday, 22 September 2017

Selection Statement- the switch case statement

THE SWITCH CASE STATEMENT:-
A switch statement is used for multiple-way selections that will branch into different code segments based on the value of a variable or expression. This expression or variable must be of integer data type.

syntax:
switch (expression)
{
  case value1:
    code segment1;
    break;
  case value2:
    code segment2;
    break;
.
.
.
  case valueN:
    code segmentN;
    break;
  default:
    default code segment;
}
Above is the representation of the switch case. In switch-case, the program asks you about your choice and that choice will run. now understand its syntax. First, we provide the choice to the switch case and that particular choice will run after that program shows the result, it doesn't go to another part of the program because that particular case terminated by the break. The default choice is there if anyone tries to run the wrong choice it will show the default code segment.

program for basic calculation by using switch case:
#include<iostream>
using namespace std;
int main(){
 int ch,x,y,z;
 cout<<"1.ADDITION"<<endl;
 cout<<"2.SUBTRACTION"<<endl;
 cout<<"3.MULTIPLY"<<endl;
 cout<<"4.DIVISION"<<endl;
 cout<<"5.MODULUS"<<endl;
 cout<<"Enter your choice:";
 cin>>ch;
 switch(ch){
  case 1:
   cout<<"Enter first no:";
   cin>>x;
   cout<<"Enter second no:";
   cin>>y;
   z=x+y;
   cout<<"Addition of two no. is "<<z<<endl;
   break;
  case 2:
   cout<<"Enter first no:";
   cin>>x;
   cout<<"Enter second no:";
   cin>>y;
   z=x-y;
   cout<<"Subtraction of two no. is "<<z<<endl;
   break;
  case 3: 
   cout<<"Enter first no:";
   cin>>x;
   cout<<"Enter second no:";
   cin>>y;
   z=x*y;
   cout<<"Multiplication of two no. is"<<z<<endl;
   break;
  case 4:
      cout<<"Enter first no:";
   cin>>x;
   cout<<"Enter second no:";
   cin>>y;
   z=x/y;
   cout<<"division of two no. is "<<z<<endl;
   break;
  case 5:
   cout<<"Enter first no:";
   cin>>x;
   cout<<"Enter second no:";
   cin>>y;
   z=x%y;
   cout<<"Modulus of two no. is "<<z<<endl;
   break;
  default:
  cout<<"Wrong choice";
 }
 return 0;
}

output:
1.ADDITION
2.SUBTRACTION
3.MULTIPLY
4.DIVISION
5.MODULUS
Enter your choice:1
Enter first no:12
Enter second no:12
Addition of two no. is=24
In the above program, there are five choices if someone wants to choose a particular function just input the choice number and that particular function will run. The break will separate the function if you are not using the break after the break all functions will run. The default will show the wrong choice here.
Note: if you don't know what is the modulus? Please click here

Difference between if-else and switch case:

  • An if-else decision is taken on basis of the input wherein the switch-case decision is taken by the user.
  • if-else is more complex for the lengthy condition than switch-case.
  • if-else can check multiple conditions at a time where switch-case check the only single condition at a time


Monday, 18 September 2017

How to write a program without using semicolon in C++?

As we know every line in C++ ends with the semicolon but we can print a string without using any semicolon in the program. we can print string by using if-else, looping or switch case but here I'm print a string with if-else without using the semicolon.

program to print a string without using any semicolon:-
#include<iostream>
using namespace std;
 main()
{
 if(cout<<"Hello World"){
 }
}
 output:-
Hello World

In the above, you see that there is no semicolon used in the program and also it is most frequently asked interview question.


Thursday, 14 September 2017

Decision Making Statement:- If-else Statement

Control Statements enable us to specify the flow of program control,i.e. the order in which the instructions in a program must be executed. They make it possible to make decisions, to perform tasks repeatedly or to jump from one section of code to another.

There are four types of control statements in C++:
  •  Decision Making Statements
  •  Selection Statements 
  •  Iteration Statements 
  •  Jump Statements 
Decision-Making Statement: the if-else statement

The if-else statement is used to carry out a logical test and then take one of two possible actions depending on the outcome of the test(i.e. whether the outcome is true or false).
                     flowchart of if-else statement


Here, we give a condition to the program if the condition is true then the body inside the if statement is executed and, code inside the if will run, otherwise else statement is executed and, the code inside the if is skipped.

syntax:
if (condition)

{

  statements

}

  else

{

  statements

}
program to check whether a person is adult or not:
#include<iostream>
using namespace std;
int main()
{
int age;
cout<<"Enter the age:";
cin>>age;

if(age<18)
{
 cout<<"juvenile"<<endl; 
}

else 
{
 cout<<"Adult"<<endl;
}

return 0;
}
output:-
Enter the age:16
juvenile
Enter the age:21
Adult

Nested if and if-else statement

It is possible to embed or to nest if-else statements one within the other. Nesting is useful in situations where one or several different courses of action need to be selected.

syntax:
if(condition1)
{
// statement(s);
}
else if(condition2)
{
//statement(s);
}
.
.
.
.
else if (conditionN)
{
//statement(s);
}
else
{
//statement(s);
}

here, the program checks the condition of if  ,if-else and else, from these conditions which are true will be executed rest are skipped by the program.

program to find the greatest of three numbers:-
#include <iostream>
using namespace std;

int main()
{
    float n1, n2, n3;

    cout << "Enter three numbers: ";
    cin >> n1 >> n2 >> n3;

    if((n1 >= n2) && (n1 >= n3))
        cout << "Largest number: " << n1;
    else if ((n2 >= n1) && (n2 >= n3))
        cout << "Largest number: " << n2;
    else
        cout << "Largest number: " << n3;
    
    return 0;
}
output:-
Enter three numbers:12
34
23
Largest number:34

In the above program, if n1>n2 and n1>n3 then if statement will be executed, if n2>n1 and n2>n3 then if-else statement will be executed, if n3>n1 and n3>n2 then else statement will be executed.


Saturday, 2 September 2017

What is bits/stdc++.h in C++?(master file in C++)

<bits/stdc++.h> is a master file in c++. It is basically a header file which includes every standard library file. you need this file when you don't know which standard file is included in the program. It saves our time and solves the confusion. Let take an example if you want to find square root of a number, you have to include <math.h> file but if you use  <bits/stdc++.h> you don't need any other file.

#include<bits/stdc++.h>
using namespace std;
int main()
{
   float a;
   cout<<"Enter the number:";
   cin>>a;
   cout<<"Square root of the number is:"<<sqrt(a)<<endl;
   return 0;
}

output:-

Enter the number:3
Square root of the number is:1.73205

NOTE: <bits/stdc++.h> is use instead of <iostream> in C++.

ADVANTAGES:-


  1. In the competitive contest, using this file is a good idea, when you want to reduce the time wasted in doing chores, especially when your rank is time sensitive.
  2. It reduces typing in the program and solves the confusion.
  3. you don't have to remember all the  STL of GNU C++ for every function you use.
DISADVANTAGES:-


  1. It is not a standard header file of GNU C++ library. If you use other compilers it might fail. Like there is no such file in MICROSOFT VISUAL STUDIO.
  2. Using it would increase lots of unnecessary stuff and increases compile time.
  3. This header file is not a standard header file of C++ so, non-portable and should be avoided.

Tuesday, 29 August 2017

Topics in C++

Arithmetic Operations in C++(Addition,subtraction,multiplication,division and modulus) With The Help Of Global,Local And Default Variables.

Let understand arithmetic operations with the help of global and local variables.
The arithmetic operation is used for some computation or calculation.
Addition of two variables:-
#include<iostream>
using namespace std;
int x=6; //global variable

int main()
{
   int y=60,z; /* y is declared and initialized,y and z                 are local variable */
 
   z=x+y;
   cout<<"Addition:"<<z;
   return 0;
}


output:-
Addition:66
here x is the global variable(we can use the global variable outside the main function because it is available globally) y and z are local variables(we can use these variables inside the function in which they are declared). y is declared and initialized in the main function but you can give value to y  at the runtime by using cin.

Subtraction of two variables:-

#include<iostream>
using namespace std;
int main()
{
 int x,y,z;
 cout<<"Enter the value of x:";
 cin>>x; // gives value at runtime
 cout<<"Enter the value of y:";
 cin>>y;
 z=x-y;
 cout<<"Subtraction:"<<z;
 return 0;
}
output:-

Enter the value of x:53
Enter the value of y:30
subtraction:23
Multiplication of variables:-

#include<iostream>
using namespace std;
int main()
{
 float2 w=0,x,y,z; //default value for w
 cout<<"Enter the value of x:";
 cin>>x; // gives value at runtime
 cout<<"Enter the value of y:";
 cin>>y;
 z=w*x*y;
 cout<<"multiplication:"<<z;
 return 0;
}


output:

Enter the value of x:2
Enter the value of y:3
multiplication:0


here we have a default value to w that means if we forget to give a value to w it will automatically provide a value to w.
Take an example: if we assign a value to w on runtime say w=2, then answer will be 2*2*3=12 not zero.
do it yourself give the default value of w is zero then assign a value to w by using cin then see what will be the answer and also you can assign a value for w after default value through cin then latest value of w will be include in multiplication.

Division of two variables:-
#include<iostream>
using namespace std;
int main()
{
 float x,y,z; 
 cout<<"Enter the value of x:";
 cin>>x; 
 cout<<"Enter the value of y:";
 cin>>y;
 z=x/y;
 cout<<"Quotient:"<<z;
 return 0;
}

output:-
Enter the value of x:67
Enter the value of y:9
Quotient:7.44444
Modulus of two variables:-
#include<iostream>
using namespace std;
int main()
{
 float x,y,z; 
 cout<<"Enter the value of x:";
 cin>>x; 
 cout<<"Enter the value of y:";
 cin>>y;
 z=x%y;
 cout<<"Remainder:"<<z;
 return 0;
}

output:-
Enter the value of x:45
Enter the value of y:6
Remainder:3
when you divide two variables it gives you quotient where modulus give you the remainder.
if you use int variables is only provide either quotient or remainder, if you use float it will give you perfect value.
Example: divide 7 by 2 if you take 7 and 2 as the integer the quotient is 3 and modulus is 1 where if you take 7 and 2 as float it will give you 3.5 as answer.

                             HAPPY CODING